Showing posts with label Nail Polish. Show all posts

Thursday, September 13, 2012

Pajamas Cookie-d

For Reader R's big SURPRISE party, we had a Pajama & Pancakes theme.  I really wanted to bake some special cookie treats for party favors!


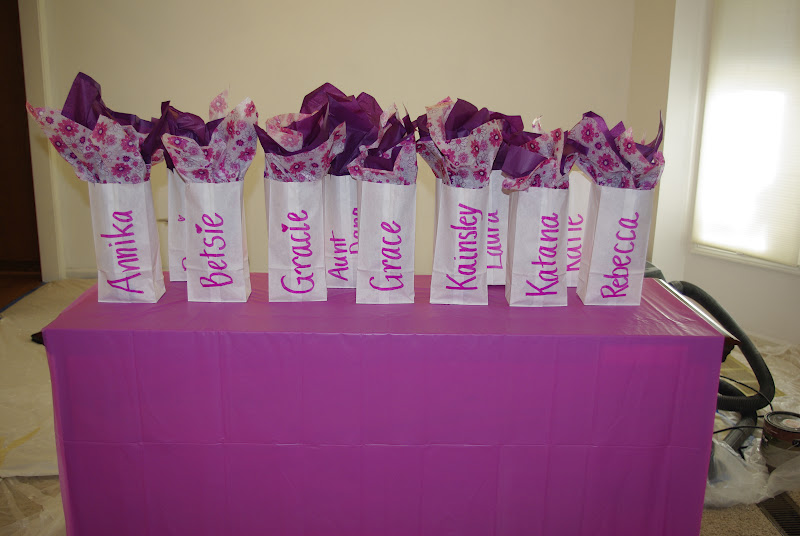
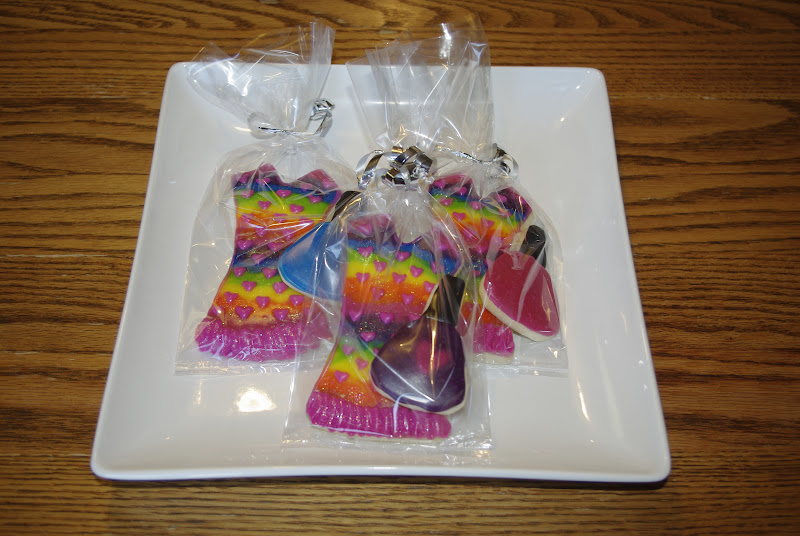
Since it was a SURPRISE party, I had to be extra stealthy about it, so I made a bunch of nail polish cookies too.  (I told her I had a last minute order for a very important customer who would pick them up for her party on Saturday... hehehe.)


Inspired by these super cute striped cookies by Oh, Sugar! Events, I endeavored to cookie my daughter's favorite pajamas.  


First of all, I had to be sneaky and get a photo of the birthday girl in her pjs... so one night, I told her I wanted to send Grandma photo of how big she was getting and got her to pose for this snap. ;^) 


Then, I didn't have the right cookie cutter for her little sleeveless gown, so I used a blouse, and then cut off the sleeves with an awareness ribbon.  I could have just used a knife, but I really wanted to keep the curve of the dress consistent, and this was the best way I could come up with to do that.


Next, I wasn't quite sure how to pull of the air-brushed look of the pjs without an airbrush, so after a quick consultation with my cookie friends, I decided I would bake enough cookies to make them two ways. 


First, I created a rainbow of glaze colors.  I tried to flood the pjs, very quickly and get them to bleed into one another, but wouldn't you know the one time you WANT your colors to bleed, they wont!  So, I ended up laying down the colors one at a time and using a tooth pick to swirl them together to create a "bleed" effect.  I sprinkled them with Rainbow Disco Dust to give them some sparkle and then once they were really dry I added the trim, the hearts and the ruffle.  The ruffle was its own challenge.  Because I decided to use glaze for these cookies due to their deep colors, the glaze was not stiff enough on its own to hold a ruffle, so I had to add just a pinch the meringue powder that I use for royal icing.  That did the trick! ;^)


I could have stopped there, but I had it in my head that I really wanted the colors to "bleed" so I decided to go ahead and make a second batch using a different method.


For the second batch of cookies, I coated them with a base coat of white glaze.  Then, I used silver luster dust, mixed with a drop of gel color, and a couple drops of vodka to create a rainbow of colors.  Then, when the white was SUPER dry, I painted the rainbow of lustery colors on in good ol' ROYGBIV order.  (Thank you to my cookie friend, Jennifer, who reminded me that is REALLY the best way to go!)


I was so pleased with how the gel color mixed in with the luster.  Now, I don't have to buy a different jar of luster for every color!  Hooray!  Next I added the hearts, the trim, and the ruffle.  Finally, as a special touch, I added a little bit of hot pink disco dust to the ruffle.

It is interesting how bright they looked when they were wet and how they kind of got pastel-y when they dried.  That was OK with me... but if you were going for bright you might want to use even more color.


I was really very pleased with both cookies.  In the end, I ended up using the first, brighter one for the party favors.  (I decided I might have a few guests who mothers would not be thrilled that on top of fruit loops, pink and purple pancakes, chocolate chips and whipped cream, cupcakes and cookies, I sent their 8 year old daughters home with a large cookie coated with vodka... ;^)  ((Just kidding, we cookiers use vodka because the alcohol evaporates so quickly that we can paint on our fragile sugar icing without the cookies getting too wet and melting.  You might have even eaten a vodka covered cookie and didn't know it! ;^))


All that is to say, I was thrilled with how they turned out, and I think the birthday girl was pleased too! ;^)

Cheers!
Sarah


Wednesday, September 12, 2012

SURPRISE! Happy Birthday Reader R! (part II)

So, as you now know, this past week was Reader R's birthday....

Her BIG party, however, was almost didn't happen...  in her mind, anyway!


I had set the scene several weeks ago by telling her that "Since Daddy was celebrating a BIG birthday this year, we just won't be able to have friends party for you, too."  She accepted the information graciously, but then she, unfortunately, spent several weeks being too self-less and over concerned about our finances.  (Opps!)

Anyway, the big day came, and all of her sweet little friends gathered at our house and anxiously awaited her arrival.  


I had decorated with LOTS of balloons, streamers, plastic table cloths, and pieces of fabric leftover from a baby shower several years ago.  Since I was trying to keep within a budget, I was thrilled to figure out that I could make these super fun tissue poofs, using the stash of leftover pink and purple tissue I have meticulously smoothed out and saved for the last 8 years!  I started with this great tutorial that I found on Pinterest.  (My only additions would be that you can use 1/2 a sheet for smaller balls, and for bigger balls, I liked 15-16 sheets better than 10, which looked a little sparse to me.)


The girls made fruit loop necklaces and played a couple of ice-breaker games while they waited for sweet R.  


When she got here, Reader R. was super surprised, and the girls rushed her with a big group hug!


Next, we had a super-girly breakfast with pink and purple pancakes, cherry yogurt, and sausage.  At the suggestion of this great blog post from Cassie at Hi Sugarplum,  I put fun toppings (strawberries, blueberries, bananas, granola, chocolate chips, and whipped cream) on the table for the pancakes and yogurt. (Actually, I got a LOT of "my" ideas from Cassie!!! Thank you!)  The girls also had fun cutting their pancakes into fun shapes with cookie cutters!


After breakfast, I painted the girls toenails.  (I had asked permission from the parents ahead of time, which was a good thing, because one little girl said "My mom doesn't let me paint my toenails without adult supervision."  I guess, I didn't count as an adult. ;^))  I kept the colors simple, pink, purple or blue, and then a second coat of "princess sparkles."  It was so fun.  the girls sat in a semi-circle around half of a dollar store plastic table cloth.  It was a great way to keep the nail polish put.  When we were done, I just wadded up the table cloth and tossed it!


Even her little sisters got in on all of the fun!

I kept the girls hands busy with a fun craft while I was painting their toes!  We made these cute flip-flops! I used this tutorial to do all the prep work ahead of time.  I also made a pair for myself and the two little sisters ahead of time, since I knew we would need a prototype and they wouldn't be able to get theirs done without my help and I would be painting toenails!


We opened gifts and then sang Happy Birthday!

Then, we enjoyed the cute cupcakes at the top of the post.  My good cookie friend, Kim from the Cookie Puzzle, lent me her fingernail polish cookie cutter and her recipe for glaze icing, which made these  nail polish bottles shinny and extra fun!  Thanks Kim!!


(Please ignore the construction zone in the background...
my wonderful husband is painting my dining room!)


The party favor bags included a bottle of water (wrapped in hot pink duct tape, like this idea, and then labeled with a fancy initial sticker; sorry, I forgot to take a picture), a package of pink bubble gum, and a set of party favor cookies with a pair of pjs (just like my daughter's favorites) and a bottle of nail polish.  (I'll post more about the PJ cookies soon.)

I also threw in a kit to make a cute bracelet that I had picked up in a 10 pack at Hobby Lobby, that was my back up craft, but that we ran out of time to do at the party!


A special thanks to Poppie for taking Reader R on a special date night and sleep over, so we could decorate  and really surprise her!  Thanks to Aunt Dana for being my right-hand girl, helping out in every way on party day!  Thanks to my Sweetheart for working so hard to help get the house ready and for capturing the big event for me!  Thank you to Kim and my SweetBook Sisters for all of your encouragement!  Thank you to Hi Sugarplum, Oh Sugar Events, Design Dazzle, and a thousand other hard-working moms on Pinterest for inspiration!

All pandemonium broke loose at pick up time when we momentarily lost control of the party! ;^)

Cheers!!
Sarah

P.S. - Come back tomorrow for all the details on the PJ cookies!